Layout
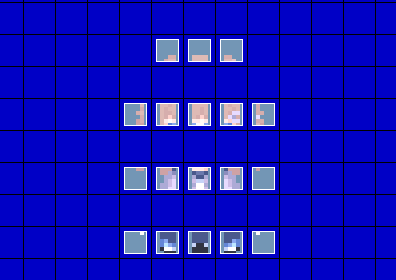
Charsets, short for "Character sets", are used to add characters to your map. They can be used too for adding graphics in general in case you're running low on tileset space. There is no limit to the number of charsets you can use in a single map. Each charset frame has a size of 24 x 32 pixels. Below is the charset template which you can use.
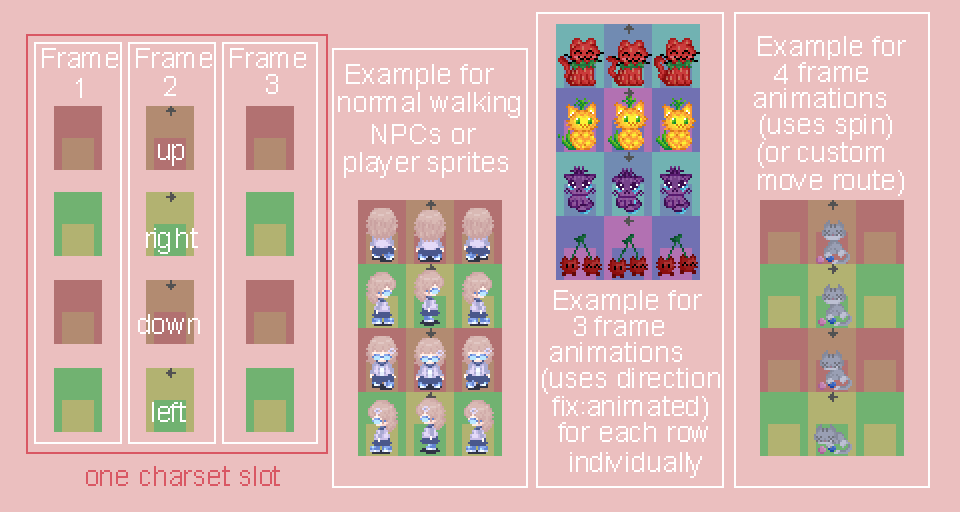
Each charset slot, 8 of which are on a single charset sheet, consists of 3 rows by 4 columns. From top to bottom, the facing direction of frames is Up, Right, Down, and Left. They are denoted by arrows on the template above. The squares inside each frame on the template show the tile size for reference. You will place your graphics differently depending on how you want to animate them. Further down in the guide the animation types will be explained.
Importing
Preparing the charset for importing
- In your graphics editor, add a new layer below your charset graphics layer. Make this layer a solid color. Make sure the color is unused on your charset.
- Export your charset as a .png image. Other image file formats like .bmp and .xyz can work, but they are not recommended.
- Index your charset's color palette to an 8-bit palette / 256 colors. If you are not sure how to do that, search online for "Index color palette 8-bit (your graphics editor here)".
- Save as a .png, now your charset is ready for importing into RPG Maker 2000 / 2003.
Importing the charset
- In your RPG Maker project, in the top bar, go to Tools then choose Resource Manager.
- Select the Charsets folder, and click Import.
- Select your charset image file.
- Click on the transparent color anywhere in your charset. The transparent color is the solid color you filled your charset with earlier. It is not actually transparent in the editor, but in the game it will be. If you do it right, the transparent color should start flashing.
- Click OK.
- If you get any errors, make sure your charset follows the charset template, is 288 x 256 pixels in size, has a transparent color picked, uses the png file format, and is indexed to 8 bit (has only 256 colors).
Placing the charset in your map
- Right click on the tile in your map you want to place your charset on and choose Create Event.
- In the Graphics section, choose Set and select your charset file.
- Click the charset slot you want to place down, and use the direction option to choose which direction the graphic is facing, and the pattern option to pick one from the 3 frames.
- If you tick the transparent check box, your graphic will have its opacity decrease by 50%.
- Pick priorty, animation type, movement speed, and movement type. Further in the guide they will be explained in more detail.
- Click Apply to save.
Priority is the passability of the charset graphic.
- Above Characters: Graphic is overlayed on top of the player.
- Same as Characters: Graphic is impassable, but can be walked behind.
- Below Characters: Graphic is below the player and can be walked over..
Movement Type
Defines how your charset graphic moves. If choosing a movement type other than stationary, there is a Frequency option available which defines how frequently the chosen movement occurs.
- Stationary: The default movement type. Graphics with this type will stay in place.
- Random: Graphics will move randomly around a map. The Frequency option determines how frequently they change their direction.
- Vertical: Graphics will move vertically in the set direction chosen in the graphics section, until they hit a collision, then switch their direction to move in the opposite vertical direction.
- Horiztonal: Graphics will move horiztonally in the set direction chosen in the graphics section, until they hit a collision, then switch their direction to move in the opposite horiztonal direction.
- Approach Player: Graphics will move towards the player.
- Away from Player: Graphics will move away from the player.
- Custom: You can set a non-random predefined move route here for the graphic to get it to move a certain way. Useful for animating things by setting them to turn to a different direction to display other frames.
Animation types
Animation type is an option you choose to decide how your charset graphics animate in the game. The most important ones you would use are:
- Stationary Animation: Your graphic will stay still and keep the middle frame in the charset. If combined with movement type of random, this leads to the still frame being using when the graphic stops moving.
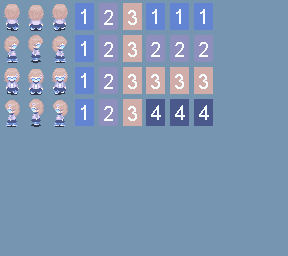
- Walking Animation: Your graphic will keep constantaly moving and playing the walking animation. If combined with movement type of random, this leads to the character to keep the walking animation even if they have stopped moving. The animation is played in order of 2 - 1 - 2 - 3, where each number refers to each direction frame from left to right per one charset slot on the template.
- Direction Fix: Animated Plays only the animation from a single direction on the slot. The animation is played in order of 1 - 2 - 3 - 2, where each number refers to each direction frame from left to right per one charset slot on the template. Can be used for non-NPCs to display tiles with 3 frame animations.
- Spin: Graphic spins using the middle frame in all directions. The animation is played in order of 1 - 2 - 3 - 4, where each number refers to each direction frame from top to bottom per one charset slot on the template. Can be used for non-NPCs to display tiles with 4 frame animations.
- Fixed Graphic: Graphic does not animate at all and only shows the single frame selected. Useful for putting tiles using charsets on a map.
Big graphics
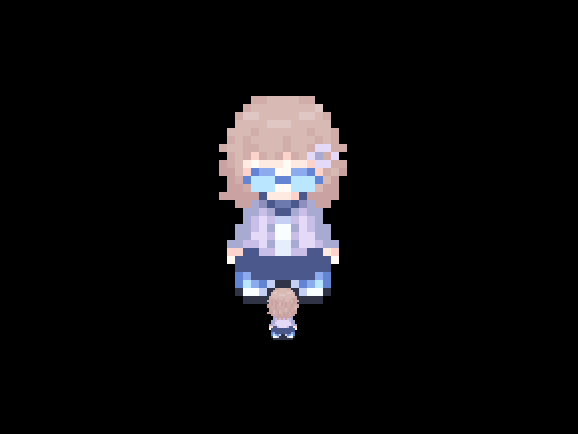
Charsets can be used to put big graphics that would take up too much tileset space otherwise. They have to be split in a way where you only take up the width of one tile for each part of the graphic. This is where the square in the charset template comes in handy. They utilize the fixed graphic animation type and stationary movement type to work.
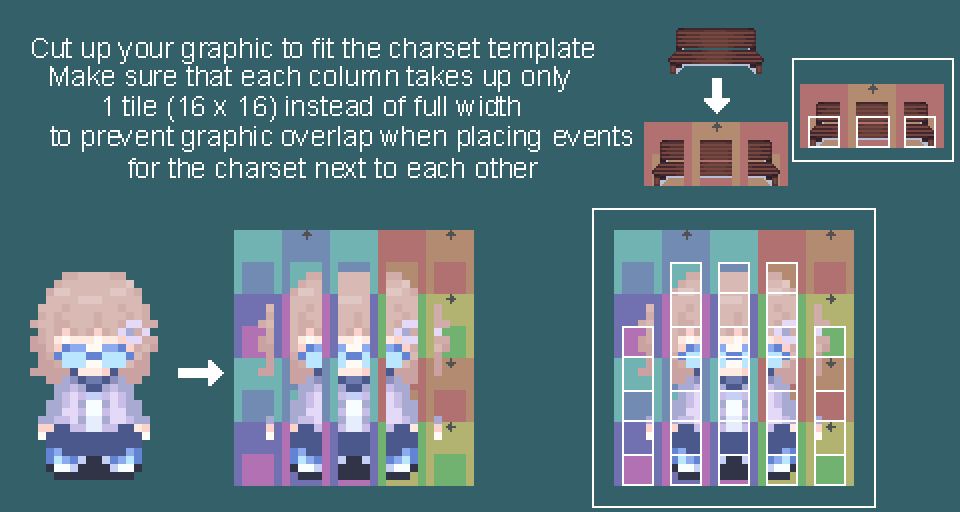
Put down events to set up the big graphics on your map. Search through the direction and pattern options in the event graphic option until you find the needed piece. Keep in mind they have to be one tile away from each other VERTICALLY. Use same as characters passability for impassable parts, below characters passability for walkable parts, and above characters passability for overlayed parts.